Pressure advance is a feature in 3D printing that adjusts the extruder's pressure in real-time to reduce filament compression, resulting in more accurate and consistent extrusion. It is especially useful when printing at higher speeds, as it can help prevent issues such as under-extrusion, stringing, and blobbing.
In a typical 3D printer, the filament is pushed through the nozzle by a motor-driven extruder. However, the extruder motor takes a certain amount of time to build up pressure in the nozzle, resulting in a delay between when the motor starts moving and when the filament actually starts extruding. This delay can lead to inconsistencies in extrusion, as the filament may start extruding too late or too soon.
Pressure advance works by anticipating this delay and increasing the pressure in the nozzle before the motor starts moving. This is done by extruding a small amount of filament at a higher speed just before a move, which helps to build up pressure in the nozzle. The amount of pressure advance required depends on various factors such as the printer's hardware, firmware, and slicer settings, and it needs to be calibrated carefully for optimal results.
Klipper is a popular firmware for 3D printers that includes advanced pressure advance tuning capabilities. It allows users to fine-tune pressure advance settings for each individual printer, nozzle, and filament, which can help to achieve more accurate and consistent extrusion, leading to better overall print quality.
Tuning Pressure Advance
View Klipper Pressure Advance Documentation
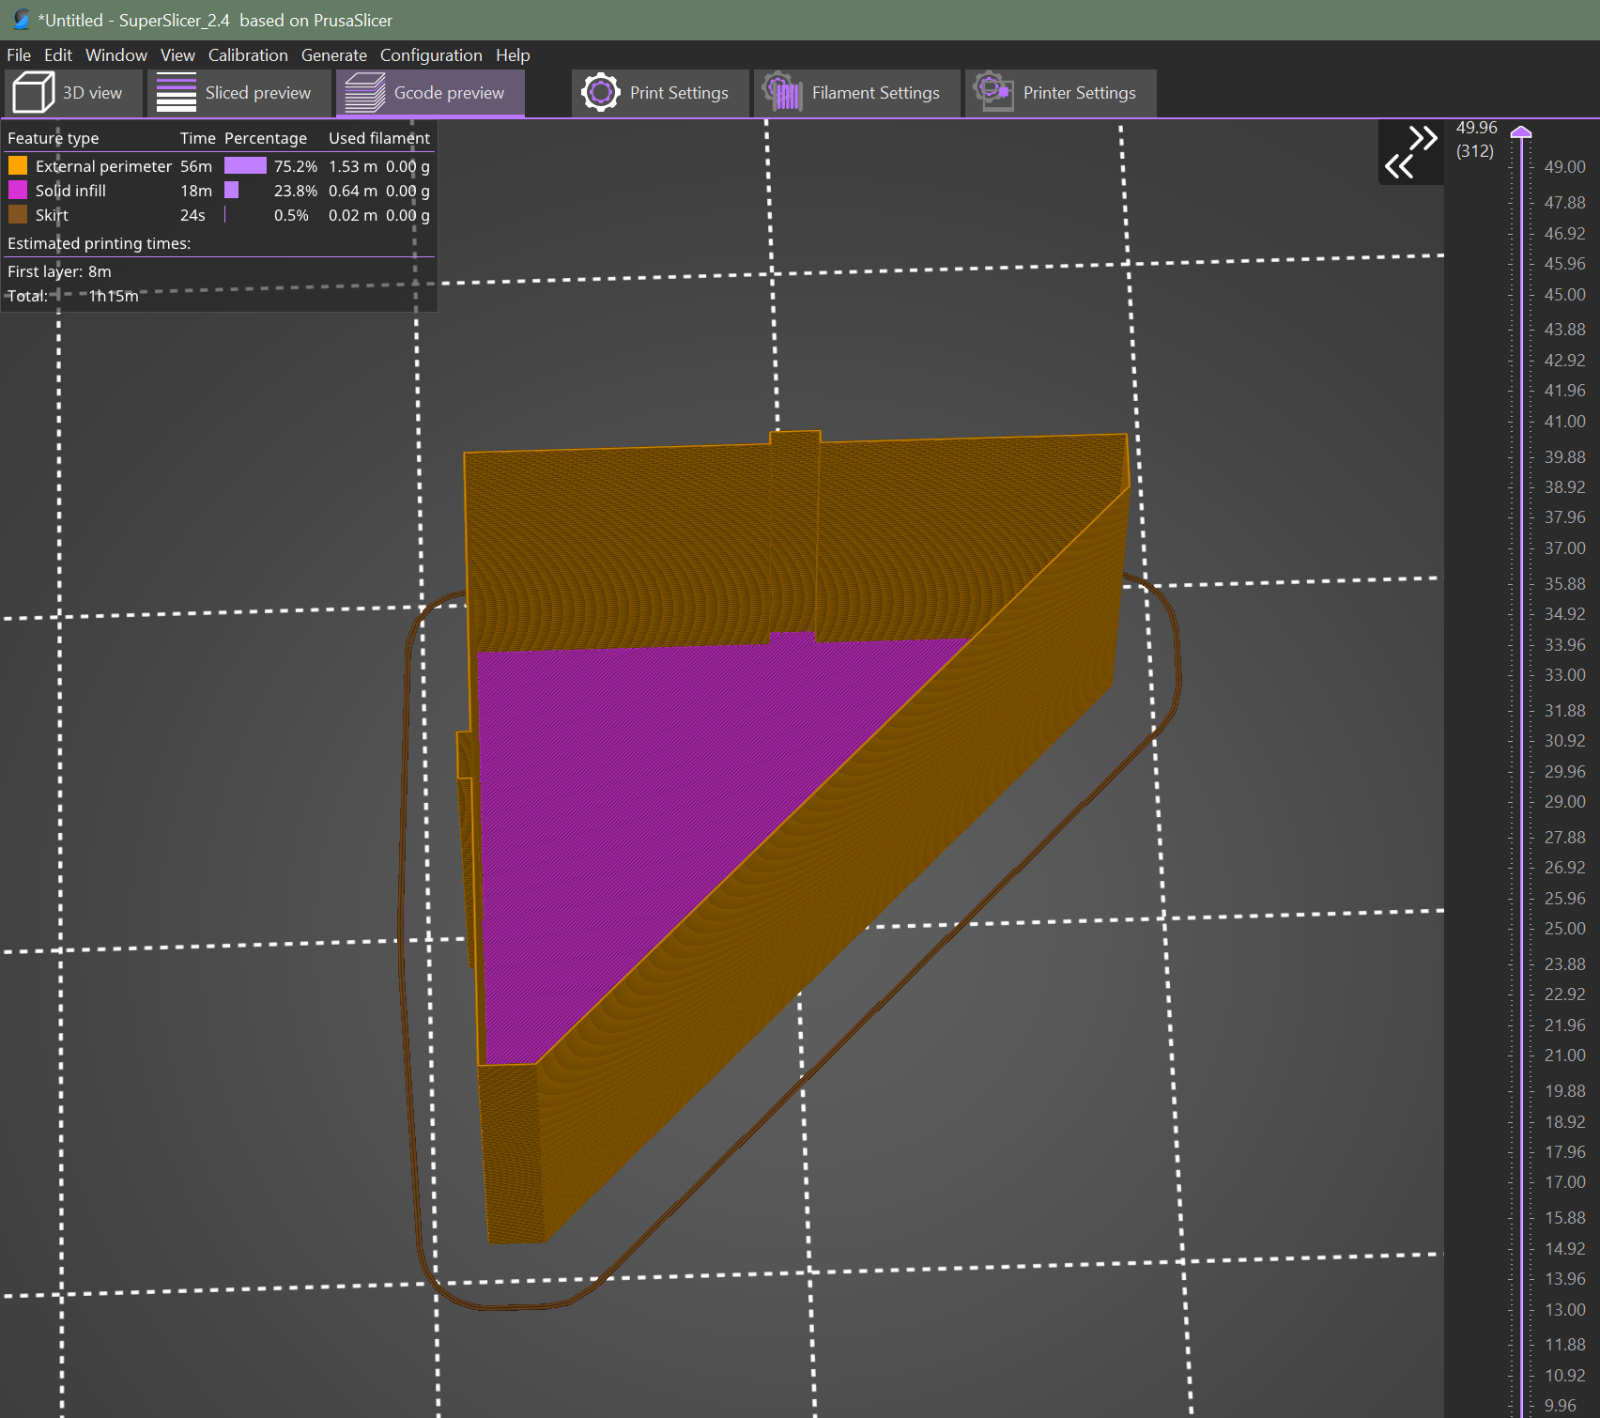
The first thing you are going to need is an STL file to print. The recommended pressure advance STL is difficult to print. The speed at which this test is printed makes it tough to get the first layer and subsequent layers to print. I recommend using this STL for the Klipper pressure advance tuning:
Klipper Pressure Advance Tower V2.stl
In your preferred slicer, load the above STL file and set it to print at 100mm/s, zero infill, and a coarse layer height. Also make sure to turn off any 'dynamic acceleration control' in the slicer. I typically print one or two floors for this test.
- Speed: 100mm/s
- Layer Height: 75% of Nozzle dia
- Infill: 0
- Walls: 1
- Floor: 1 or 2
Pressure advance should be tuned on a per nozzle basis. If you are using a .6mm nozzle, set the layer height to be 0.45mm. The layer height should be set to be about 75% of the nozzle diameter.
Once you have your gcode file ready for printing enter the following command in the Klipper console to prep for the test:
SET_VELOCITY_LIMIT SQUARE_CORNER_VELOCITY=1 ACCEL=500
Then enter one of the following commands in the Klipper console, depending on your extruder setup:
Direct Drive:
TUNING_TOWER COMMAND=SET_PRESSURE_ADVANCE PARAMETER=ADVANCE START=0 FACTOR=.005
Bowden Setup:
TUNING_TOWER COMMAND=SET_PRESSURE_ADVANCE PARAMETER=ADVANCE START=0 FACTOR=.020Print the test file
As this is printing you can see the pressure advance incrementing in the console. No need to keep an eye on that, it's just fun to watch. I let the prints go until it is obvious that the pressure advance change is to the point of continual degradation, and then I cancel the print.
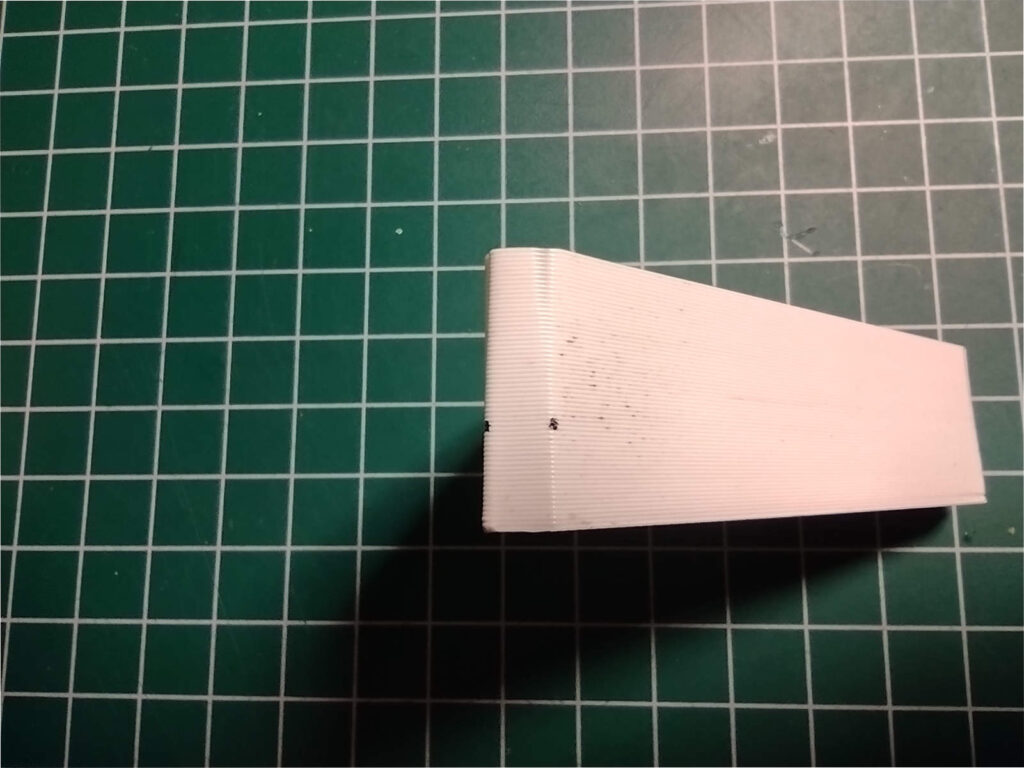
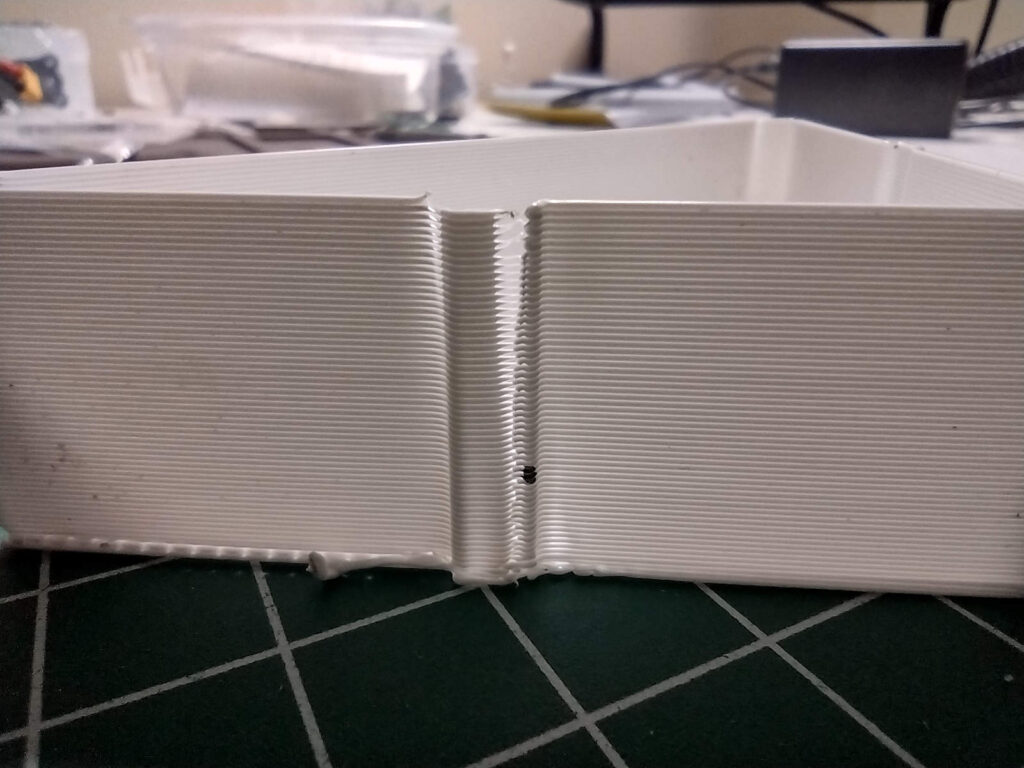
Once you are done printing it's time to break out the calipers or a metric ruler. In the photos above you can see how I have marked the spot where you have the best quality for a layer. I mark this point all the way around the print, then measure the height from the bottom of the print and take an average of them all.
The key to this is to look for the spot where the corners look the best and look the most squared off. In the second photo you can see how the areas where the seam is failing moves from the right side to the left side. The location of the dot is where the seam is the best. In this example 9mm was the average.
The pressure_advance value can then be calculated as:
pressure_advance = <start> + <measured_height> * <factor>
Example: 0 + 9 * .005 = .045
Pretty easy. The next step is key:
In SuperSlicer or PrusaSlicer, go to the Filament Settings tab and then Custom G-Code. Enter the following line and replace my pressure_advance value with the result of your test.
SET_PRESSURE_ADVANCE ADVANCE=0.045
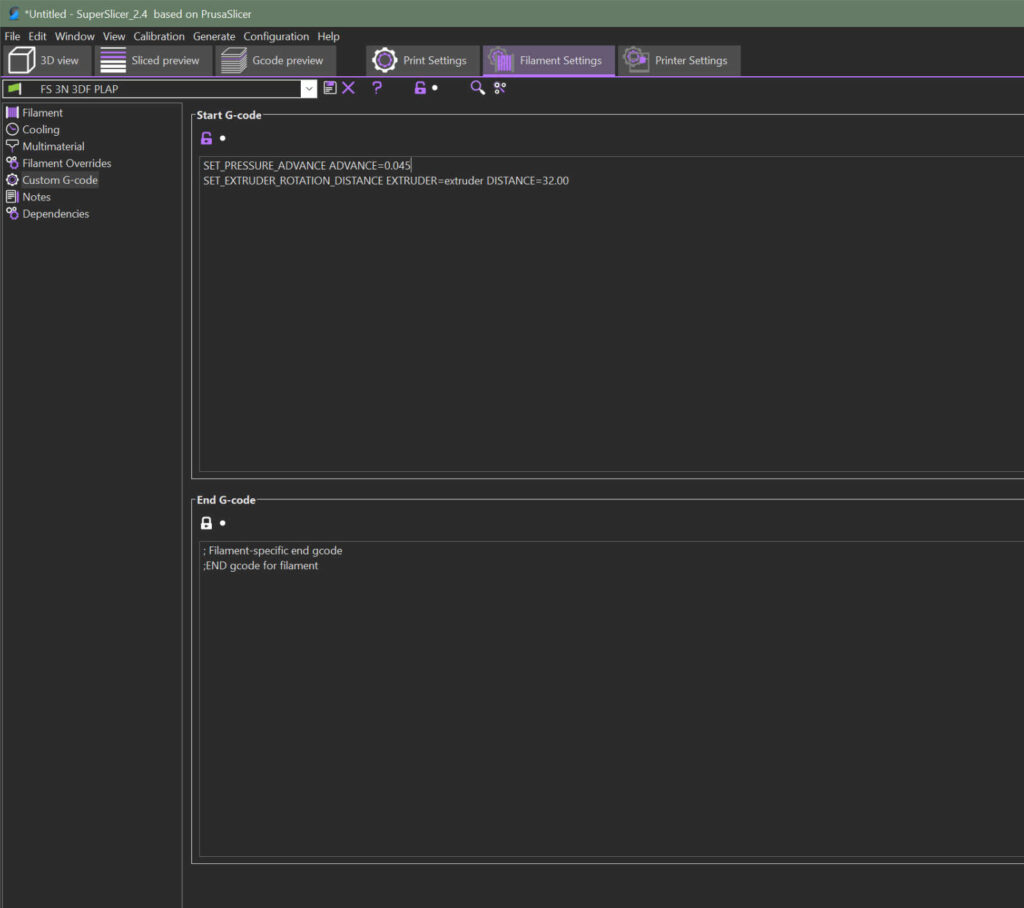
That's pretty much it. The Slicer sends the desired pressure advance value to Klipper. I set up a Filament settings profile for each Nozzle in addition for each filament. This allows you to set pressure advance on a per nozzle, per filament basis.