Here is a quick tutorial on setting up a generic BLTouch with Klipper. In this case I will be setting up a 3DTouch for use with Klipper.
I recommend purchasing a real BLTouch, for about $30, but if you end up with a generic cloned version of BLTouch, hopefully this Klipper config and tutorial will help you get it running.
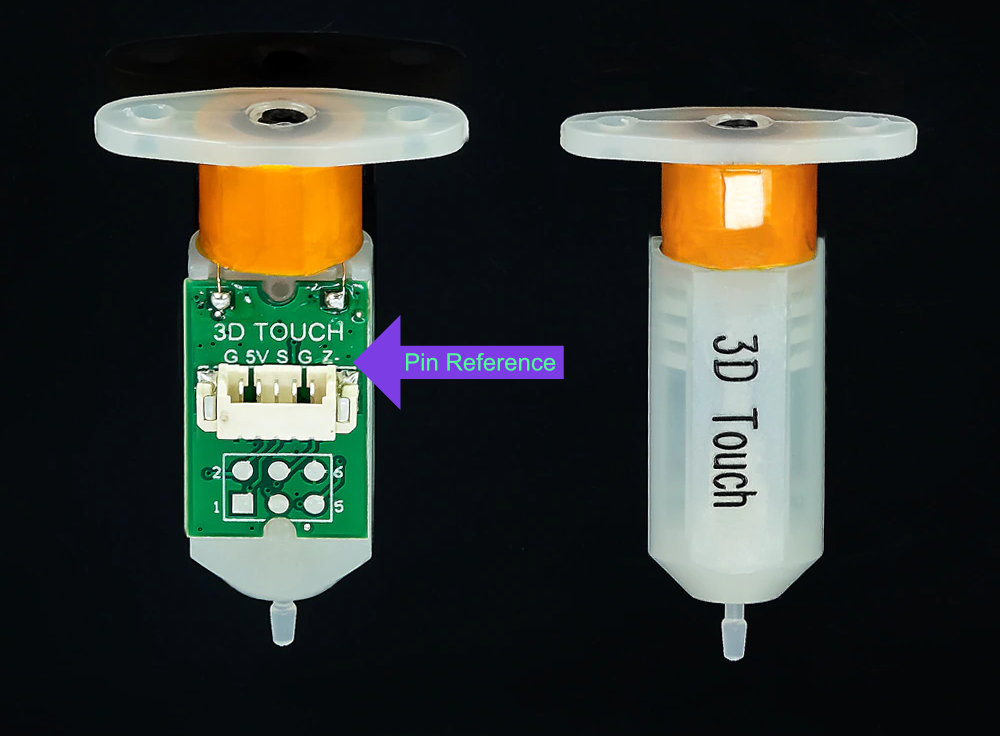
The pin assignments in this tutorial are for a BigTreeTech Manta M8P, but you can simply check the pinout of your board and replace the pin assignments in the config example below. If you remove the plug from your device you can see which pins are which and modify one of the plug ends if needed to connect this to your mainboard.
The wire connections are:
- G = Main ground
- 5V = 5 volt power
- S = Control signal
- G = Ground for Z stop
- Z = Z stop switch
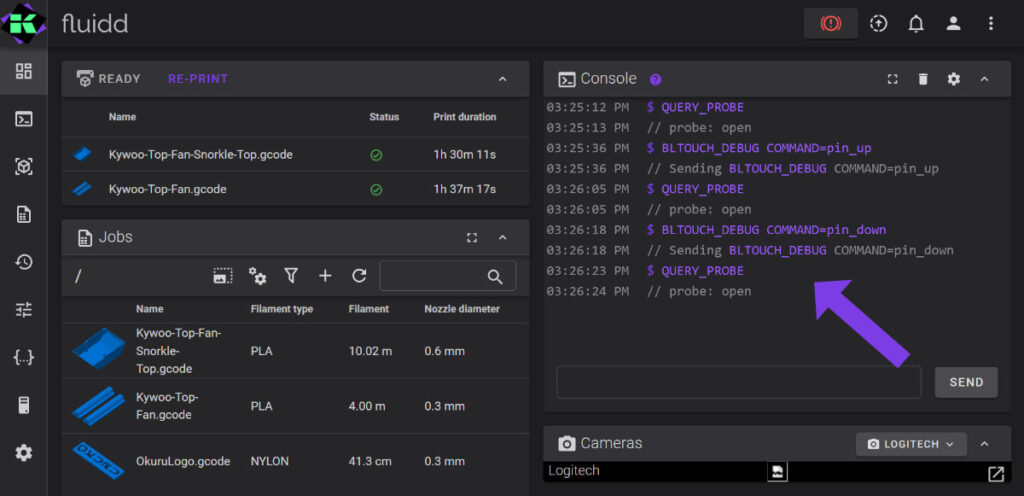
There are issues with the QUERY_PROBE command and some cloned devices. Below is a working 3DTouch config for Klipper. Make sure to use the correct sensor and control pins for your board. The stow_on_each_sample and probe_with_touch_mode are the main settings you need to get your 3DTouch working with Klipper. The rest are dependent on your particular printer.
Important: Don't be distressed about the result of QUERY_PROBE, your 3DTouch will work as expected despite the reported open conditions. Some devices only report a closed switch at the exact moment the pin touches the bed. Other devices simply don't report the proper switch position.
[bltouch]
sensor_pin: ^PB2
control_pin: PB1
x_offset = 26
y_offset = -2.9
stow_on_each_sample = False
probe_with_touch_mode = False
z_offset: 2.51 - Plug in your 3DTouch and power on your printer
- Using pinout references and the images above, set up your config section and add it to printer.cfg
- Restart Klipper/Firmware
- Run the following commands in the Klipper console one at a time, and refer to the console screenshot below to verify the results
- Verify that the 3DTouch pin is moving up and down as commanded in step 4
- If everything is in order go ahead and home your printer and verify the Z stop is functional
- Conduct a Z offset calibration and do a paper test to get your 3D printer nozzle at the correct height above the print bed
- That should be it, print on
QUERY_PROBE

BLTOUCH_DEBUG COMMAND=pin_up

QUERY_PROBE

BLTOUCH_DEBUG COMMAND=pin_down

QUERY_PROBE