I am a web developer and computer programmer by trade. Creating a KlipperScreen theme is really easy for those who are familiar with web programming languages. For the layperson creating a KlipperScreen theme is daunting. It is the goal of klipperscreeen.com to make using a custom Klipper theme easy.
If you want to grab a purple custom theme and give it a try, head to GitHub and get my OKURU KlipperScreen Theme.
If you weren't already there, check out the KlipperScreen Theme Builder. Between this article and the theme builder, you can have a custom theme up and running in no time.
This article is written with the assumption that you already have Klipper and KlipperScreen up and running and are ready to customize them to suit your personal preferences, and or match the 3D printed parts on your printer. Yeah, I know how that is.
Step 1:
Make sure you are prepped with your SSH client open and connected to your printer or Rasberry Pi/BTT CB1. I recommend downloading MobaXterm.
The following command line method is directly from klipperscreen.readthedocs.io, but you can set up your theme using the MobaTerm file manager and drag and drop just as easily as using the command line, so skip this next part if you are not comfortable using Linux/Pi commands.
Decide upon a cool name for your theme to replace the mycooltheme term below
No spaces, use hyphen to separate terms as needed
Run the following commands one at a time and follow along in the list below
cd ~/KlipperScreen/styles

mkdir -p mycooltheme/images

cd mycooltheme

cp ../colorized/images/* images/

sudo service KlipperScreen restart- Change directory to KlipperScreen/styles
- Create a new images folder
- Change directory to your newly created theme folder
- Copy an icon set from one of the other themes, colorized theme used in this example
- Restart KlipperScreen
MobaXterm Method:
Having local versions of files to edit in your own text editor is very helpful, so this method is catered toward local editing. Decide upon a location for you files before you get started. The instructions are the simplest approach to creating a custom KlipperScreen theme and its fast drag and drop to the desktop. However, you can certainly download the files directly to where you want them to be on your local computer and save that step.
- Open MobaXterm and log into you Printer/Pi/CB1
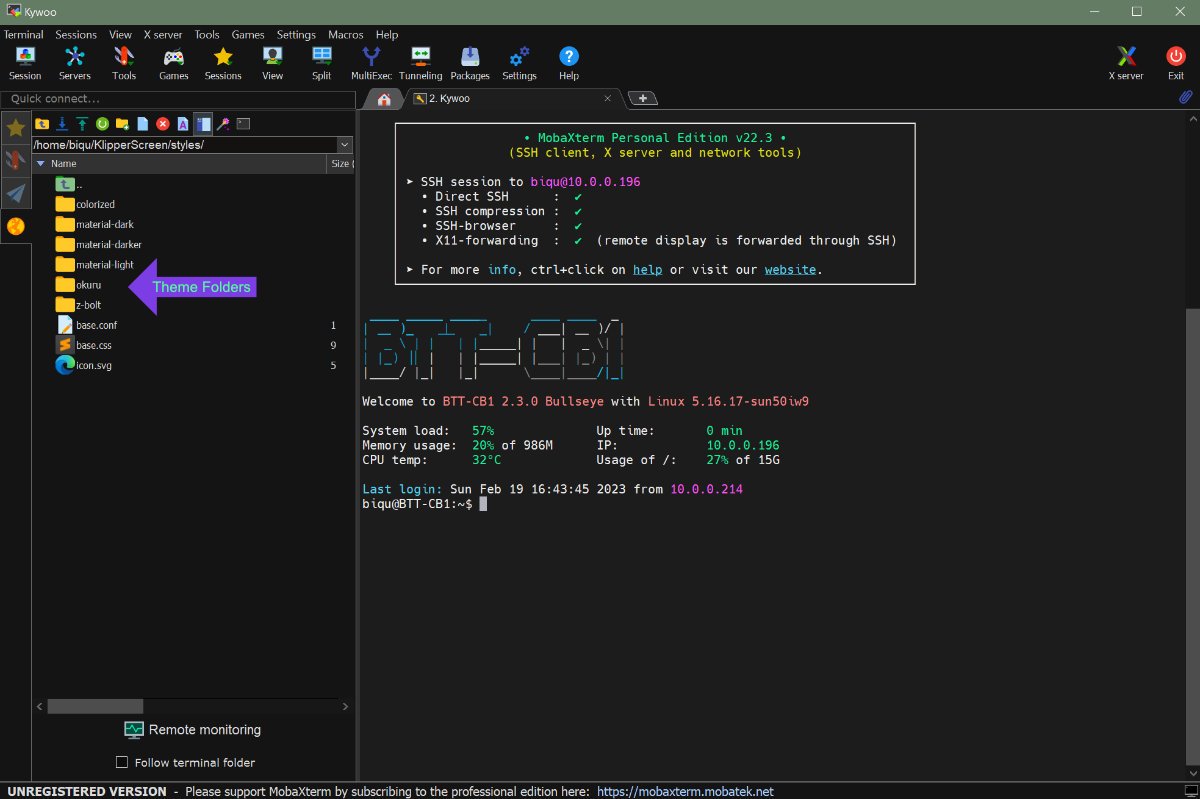
- In the sidebar click KlipperScreen to bring you to that directory
- Click into the "styles" directory
- Right click the "colorized" theme and download it to your desktop
- Rename the colorized folder to your desired theme name (No spaces, use hyphen to separate terms as needed)
- Drag your newly named folder into the MobaXterm sidebar and into the styles directory alongside the other themes
- Power down your Printer/Pi/CB1 and turn it back on
- Navigate to KlipperScreen Settings->theme and select your new theme from the dropdown
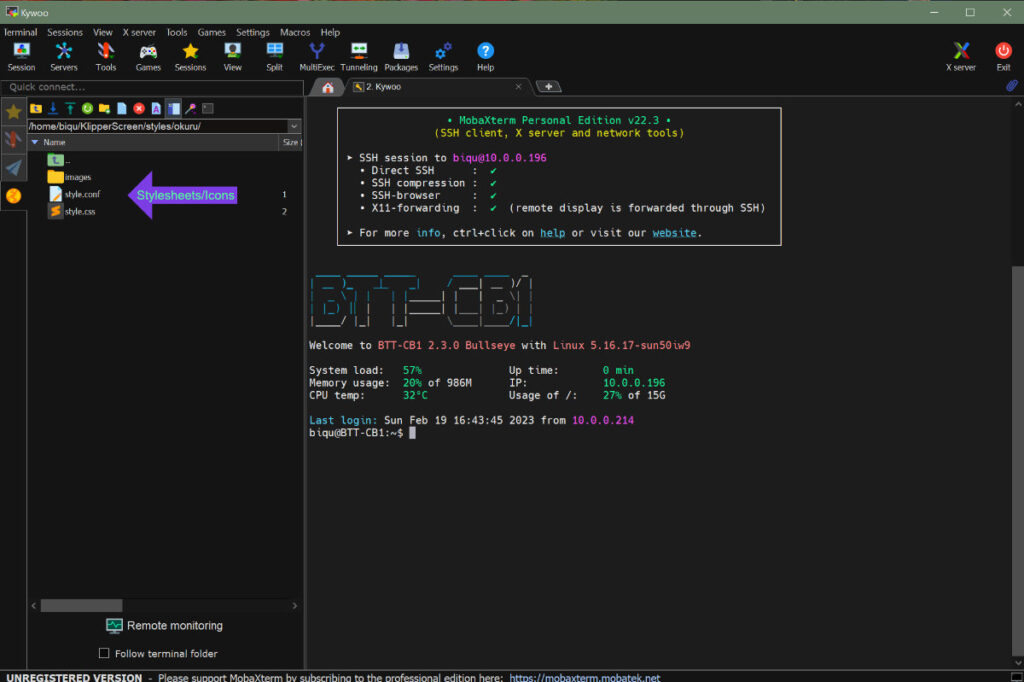
- You are now all set to start editing your theme files, simply upload your local changes to the printer as you modify the look and feel
Optional: As mentioned above, feel free to move your new theme to a local folder where you can keep it safe and happy.
Icons:
If you want to play around with the KlipperScreen SVG icons feel free. There are a lot of them and windows doesn't preview SVG by default. So github is probably the best way to see what icons look like on the various themes. In order to see SVG image previews in windows you need to install Microsoft Power Toys. Here are the default themes. Click into the images folder and you can preview the icons one at a time.
- colorized: Has colorized icons and a decent interface
- material-dark: Nice dark theme plain white icons
- material-darker: Super dark
- material-light: Light theme, I am sticking to dark themes just because
- z-bolt: Default theme
Custom Icons:
You can create your own SVG icons. 64x64 seems to be the best size for the files, scalable vector graphics here. Please be aware that the filenames must be exactly the same as the existing sets. If you check out the OKURU KlipperScreen Theme, I have replaced the home icon with the KlipperScreen.com logo.
In some cases you can change the color of SVG's with CSS but that depends on how they are embedded. It seems these icons are not easily changed with CSS. So if you want a specific color then you will probably need to create your own SVG KlipperScreen icon set. I am working on figuring out more of the markup in KlipperScreen and will modify these instructions as I learn more about how SVG's are embedding in the Python application.
The home icon is named main.svg for reference. Here is a complete list of the KlipperScreen icons as of February 2023:
arrow-down.svg
arrow-left.svg
arrow-right.svg
arrow-up.svg
back.svg
backspace.svg
bed-level-b-l.svg
bed-level-b-m.svg
bed-level-b-r.svg
bed-level-l-m.svg
bed-level-r-m.svg
bed-level-t-l.svg
bed-level-t-m.svg
bed-level-t-r.svg
bed-level.svg
bed-mesh.svg
bed.svg
camera.svg
camera2.svg
cancel.svg
clock.svg
complete.svg
console.svg
cool-down.svg
custom-script.svg
decrease.svg
delete.svg
emergency.svg
extrude.svg
extruder-0.svg
extruder-1.svg
extruder-2.svg
extruder-3.svg
extruder-4.svg
extruder.svg
fan-on.svg
fan.svg
filament.svg
file.svg
files.svg
fine-tune.svg
flow+.svg
flow-.svg
folder.svg
hashtag.svg
heat-up.svg
heater.svg
home-x.svg
home-y.svg
home-z.svg
home.svg
hourglass.svg
increase.svg
info.svg
klipper.svg
light.svg
load.svg
main.svg
motor-off.svg
move.svg
network.svg
pause.svg
print.svg
refresh.svg
resume.svg
retract.svg
sd.svg
settings.svg
shuffle.svg
shutdown.svg
speed+.svg
speed-.svg
stop.svg
toolchanger.svg
warning.svg
z-closer.svg
z-farther.svg
z-tilt.svg